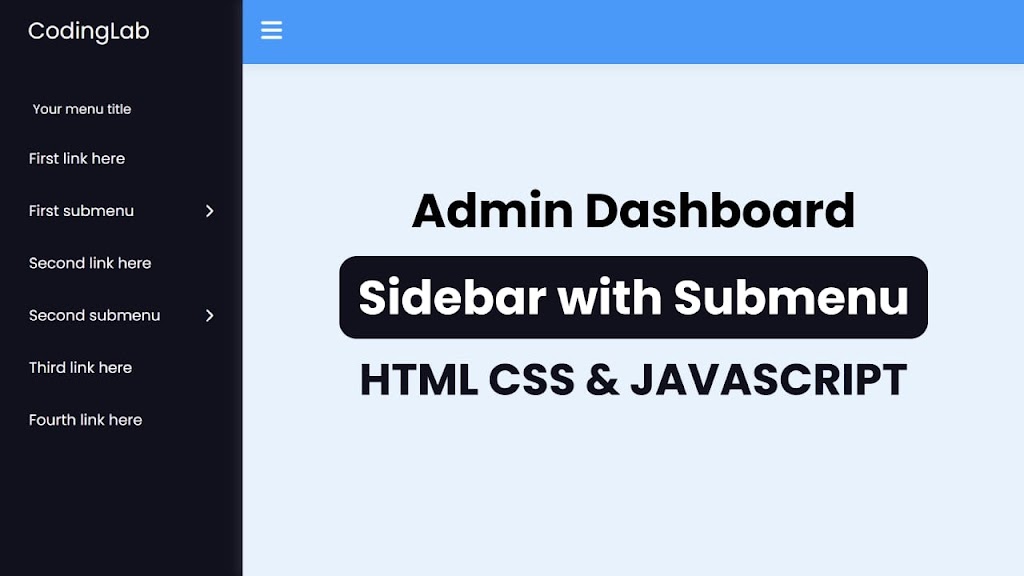
Developing proficiency in creating a sidebar menu with a dropdown is a valuable skill in the domain of web development. Although the sidebar is a fundamental component of a website, it can be created using a concise combination of HTML, CSS, and JavaScript.
Today in this blog post, you will be taught how to build a Sidebar Menu using HTML, CSS, and JavaScript, which will include the functionality of dropdown menus. I have also published a blog featuring 5 Free Sidebar Templates. I trust that they will also prove advantageous to you.
Video Tutorial of Sidebar Menu in HTML CSS & JavaScript
As demonstrated in the video tutorial of the Sidebar Menu, it has the ability to expand and collapse, and it includes a submenu feature that becomes visible upon clicking on the navigation link. The sidebar has the potential to accommodate numerous navigation links since it is scrollable.
I would highly recommend you watch the video tutorial of the Sidebar Menu. It will really help you to create this sidebar menu step by step as well as to understand HTML CSS & JavaScript code.
Steps for Creating a Sidebar Menu in HTML CSS & JavaScript
To create a sidebar using HTML, CSS, and vanilla JavaScript, follow the given steps line by line:
- Create a folder. You can name this folder whatever you want, and inside this folder, create the mentioned files.
- Create an
index.htmlfile. The file name must be index and its extension .html - Create a
style.cssfile. The file name must be style and its extension .css - Create a
script.jsfile. The file name must be script and its extension .js
Once you create these files, paste the given codes into the specified files. If you don’t want to do these then scroll down and download all the source code files of the Sidebar Menu, by clicking on the given download button.
First, paste the following codes into your index.html file.
<!DOCTYPE html>
<!-- Coding By CodingNepal - codingnepalweb.com -->
<html lang="en">
  <head>
    <meta charset="UTF-8" />
    <meta http-equiv="X-UA-Compatible" content="IE=edge" />
    <meta name="viewport" content="width=device-width, initial-scale=1.0" />
    <title>Sidebar Menu for Admin Dashboard | CodingNepal</title>
    <link rel="stylesheet" href="style.css" />
    <!-- Fontawesome CDN Link -->
    <link rel="stylesheet" href="https://cdnjs.cloudflare.com/ajax/libs/font-awesome/6.2.1/css/all.min.css" />
  </head>
  <body>
    <nav class="sidebar">
      <a href="#" class="logo">CodingLab</a>

      <div class="menu-content">
        <ul class="menu-items">
          <div class="menu-title">Your menu title</div>

          <li class="item">
            <a href="#">Your first link</a>
          </li>

          <li class="item">
            <div class="submenu-item">
              <span>First submenu</span>
              <i class="fa-solid fa-chevron-right"></i>
            </div>

            <ul class="menu-items submenu">
              <div class="menu-title">
                <i class="fa-solid fa-chevron-left"></i>
                Your submenu title
              </div>
              <li class="item">
                <a href="#">First sublink</a>
              </li>
              <li class="item">
                <a href="#">First sublink</a>
              </li>
              <li class="item">
                <a href="#">First sublink</a>
              </li>
            </ul>
          </li>
          <li class="item">
            <div class="submenu-item">
              <span>Second submenu</span>
              <i class="fa-solid fa-chevron-right"></i>
            </div>

            <ul class="menu-items submenu">
              <div class="menu-title">
                <i class="fa-solid fa-chevron-left"></i>
                Your submenu title
              </div>
              <li class="item">
                <a href="#">Second sublink</a>
              </li>
              <li class="item">
                <a href="#">Second sublink</a>
              </li>
              <li class="item">
                <a href="#">Second sublink</a>
              </li>
              <li class="item">
                <a href="#">Second sublink</a>
              </li>
              <li class="item">
                <a href="#">Second sublink</a>
              </li>
              <li class="item">
                <a href="#">Second sublink</a>
              </li>
              <li class="item">
                <a href="#">Second sublink</a>
              </li>
              <li class="item">
                <a href="#">Second sublink</a>
              </li>
              <li class="item">
                <a href="#">Second sublink</a>
              </li>
              <li class="item">
                <a href="#">Second sublink</a>
              </li>
              <li class="item">
                <a href="#">Second sublink</a>
              </li>
              <li class="item">
                <a href="#">Second sublink</a>
              </li>
              <li class="item">
                <a href="#">Second sublink</a>
              </li>
              <li class="item">
                <a href="#">Second sublink</a>
              </li>
              <li class="item">
                <a href="#">Second sublink</a>
              </li>
              <li class="item">
                <a href="#">Second sublink</a>
              </li>
              <li class="item">
                <a href="#">Second sublink</a>
              </li>
              <li class="item">
                <a href="#">Second sublink</a>
              </li>
              <li class="item">
                <a href="#">Second sublink</a>
              </li>
              <li class="item">
                <a href="#">Second sublink</a>
              </li>
              <li class="item">
                <a href="#">Second sublink</a>
              </li>
            </ul>
          </li>

          <li class="item">
            <a href="#">Your second link</a>
          </li>

          <li class="item">
            <a href="#">Your third link</a>
          </li>
        </ul>
      </div>
    </nav>

    <nav class="navbar">
      <i class="fa-solid fa-bars" id="sidebar-close"></i>
    </nav>

    <main class="main">
      <h1>Admin Dashboard Content</h1>
    </main>

    <script src="script.js"></script>
  </body>
</html>
Second, paste the following codes into your style.css file.
/* Import Google font - Poppins */
@import url("https://fonts.googleapis.com/css2?family=Poppins:wght@200;300;400;500;600;700&display=swap");
* {
  margin: 0;
  padding: 0;
  box-sizing: border-box;
  font-family: "Poppins", sans-serif;
}
.sidebar {
  position: fixed;
  height: 100%;
  width: 260px;
  background: #11101d;
  padding: 15px;
  z-index: 99;
}
.logo {
  font-size: 25px;
  padding: 0 15px;
}
.sidebar a {
  color: #fff;
  text-decoration: none;
}
.menu-content {
  position: relative;
  height: 100%;
  width: 100%;
  margin-top: 40px;
  overflow-y: scroll;
}
.menu-content::-webkit-scrollbar {
  display: none;
}
.menu-items {
  height: 100%;
  width: 100%;
  list-style: none;
  transition: all 0.4s ease;
}
.submenu-active .menu-items {
  transform: translateX(-56%);
}
.menu-title {
  color: #fff;
  font-size: 14px;
  padding: 15px 20px;
}
.item a,
.submenu-item {
  padding: 16px;
  display: inline-block;
  width: 100%;
  border-radius: 12px;
}
.item i {
  font-size: 12px;
}
.item a:hover,
.submenu-item:hover,
.submenu .menu-title:hover {
  background: rgba(255, 255, 255, 0.1);
}
.submenu-item {
  display: flex;
  justify-content: space-between;
  align-items: center;
  color: #fff;
  cursor: pointer;
}
.submenu {
  position: absolute;
  height: 100%;
  width: 100%;
  top: 0;
  right: calc(-100% - 26px);
  height: calc(100% + 100vh);
  background: #11101d;
  display: none;
}
.show-submenu ~ .submenu {
  display: block;
}
.submenu .menu-title {
  border-radius: 12px;
  cursor: pointer;
}
.submenu .menu-title i {
  margin-right: 10px;
}
.navbar,
.main {
  left: 260px;
  width: calc(100% - 260px);
  transition: all 0.5s ease;
  z-index: 1000;
}
.sidebar.close ~ .navbar,
.sidebar.close ~ .main {
  left: 0;
  width: 100%;
}
.navbar {
  position: fixed;
  color: #fff;
  padding: 15px 20px;
  font-size: 25px;
  background: #4070f4;
  cursor: pointer;
}
.navbar #sidebar-close {
  cursor: pointer;
}
.main {
  position: relative;
  display: flex;
  align-items: center;
  justify-content: center;
  height: 100vh;
  z-index: 100;
  background: #e7f2fd;
}
.main h1 {
  color: #11101d;
  font-size: 40px;
  text-align: center;
}
Third, paste the following codes into your script.js file.
const sidebar = document.querySelector(".sidebar");
const sidebarClose = document.querySelector("#sidebar-close");
const menu = document.querySelector(".menu-content");
const menuItems = document.querySelectorAll(".submenu-item");
const subMenuTitles = document.querySelectorAll(".submenu .menu-title");

sidebarClose.addEventListener("click", () => sidebar.classList.toggle("close"));

menuItems.forEach((item, index) => {
  item.addEventListener("click", () => {
    menu.classList.add("submenu-active");
    item.classList.add("show-submenu");
    menuItems.forEach((item2, index2) => {
      if (index !== index2) {
        item2.classList.remove("show-submenu");
      }
    });
  });
});

subMenuTitles.forEach((title) => {
  title.addEventListener("click", () => {
    menu.classList.remove("submenu-active");
  });
});
If you face any difficulties while creating your Sidebar Menu or your code is not working as expected, you can download the source code files for this Sidebar Menu for free by clicking on the download button, and you can also view a live demo of this card slider by clicking on the view live button.


