Hello brother, I believe you are doing and creating fantastic projects. Today I have brought a interesting project for you and that is a Credit UI Design using HTML and CSS. As I have already created lots of Card Design but by now this credit card design will be my first project.
Credit card is the medium that issued by the bank and financial institution which allow card holder to our purchase goods and services in credit. There are lots of designs that card has and their various types also like master card, visa card, debit/credit and so on.
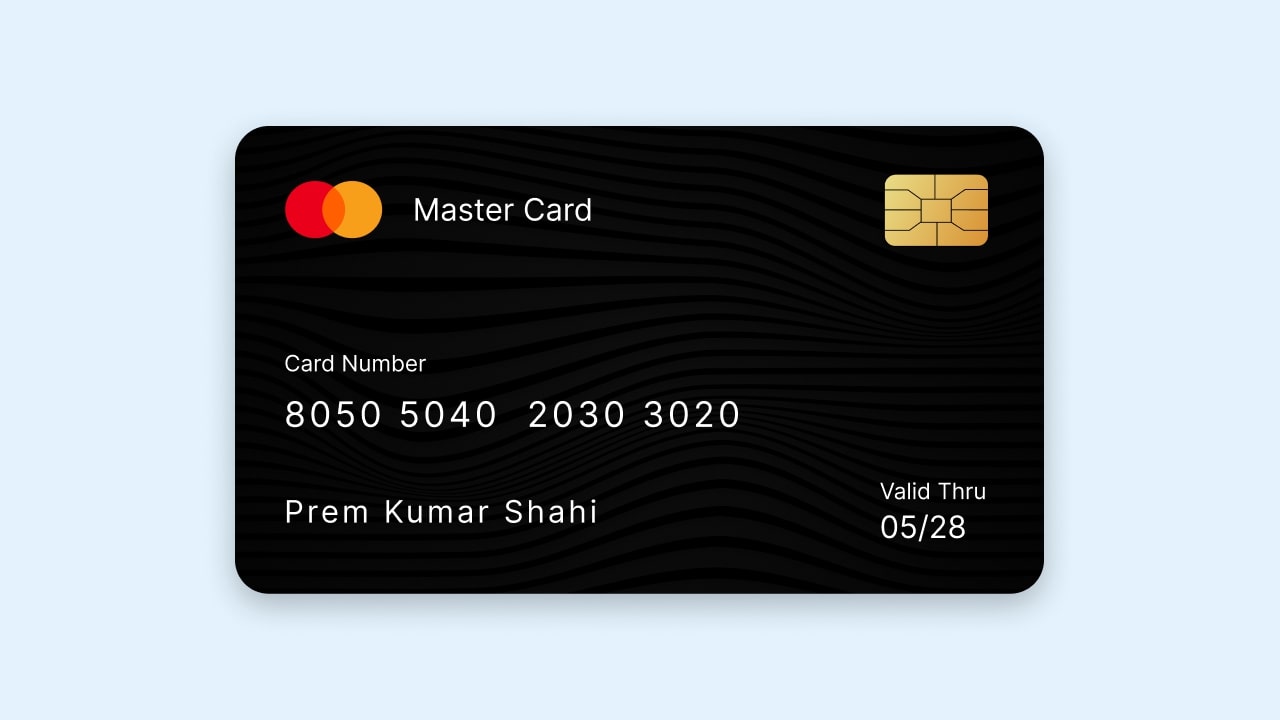
Take a look on the given image of our Credit Card. As you can see on the top section, I have added master card logo and text, next to it there is a chip of that card, in the middle section there is card number and underneath of it there are name and expiry date.
To see the real demo of this credit card and all the HTML and CSS code that I have used to create this credit card, You can watch the given video tutorial of this credit card.
Credit Card Ui Design in HTML & CSS | Video Tutorial
I have provided all the HTML and CSS code with the image that I have used to make this Credit Card UI Design. Before getting into the source code files, I would to explain about the given video in sort.
As you have seen in the video tutorial of the Credit Card UI Design. As the top section I added logo and chip which was image. At the middle section I added some text and number and at the bottom I added name and valide date. To create this all interface I just used HTML and CSS.
I hope now you can make this Credit Card Ui Design by using HTML & CSS. If you are feeling difficulty to create this credit card, I have provided all the code and images below, from there you can simply copy or download all the source code files.
You Might Like This:
Credit Card Ui Design [Source Codes]
- Create a folder. You can name this folder whatever you want, and inside this folder, create the mentioned files.
- Create an
index.htmlfile. The file name must be index and its extension .html - Create a
style.cssfile. The file name must be style and its extension .css
<!DOCTYPE html>
<!-- Coding By CodingNepal - codingnepalweb.com -->
<html lang="en">
  <head>
    <meta charset="UTF-8" />
    <meta http-equiv="X-UA-Compatible" content="IE=edge" />
    <meta name="viewport" content="width=device-width, initial-scale=1.0" />
    <title>Credit Card Ui Design</title>
    <link rel="stylesheet" href="style.css" />
  </head>
  <body>
    <div class="container">
      <header>
        <span class="logo">
          <img src="images/logo.png" alt="" />
          <h5>Master Card</h5>
        </span>
        <img src="images/chip.png" alt="" class="chip" />
      </header>

      <div class="card-details">
        <div class="name-number">
          <h6>Card Number</h6>
          <h5 class="number">8050 5040 2030 3020</h5>
          <h5 class="name">Prem Kumar Shahi</h5>
        </div>
        <div class="valid-date">
          <h6>Valid Thru</h6>
          <h5>05/28</h5>
        </div>
      </div>
    </div>
  </body>
</html>
/* Import Google Font - Poppins */
@import url("https://fonts.googleapis.com/css2?family=Poppins:wght@300;400;500;600&display=swap");

* {
  margin: 0;
  padding: 0;
  box-sizing: border-box;
  font-family: "Poppins", sans-serif;
}
body {
  min-height: 100vh;
  display: flex;
  align-items: center;
  justify-content: center;
  background: #e3f2fd;
}
.container {
  position: relative;
  background-image: url("images/bg.png");
  background-size: cover;
  padding: 25px;
  border-radius: 28px;
  max-width: 380px;
  width: 100%;
  box-shadow: 0 5px 10px rgba(0, 0, 0, 0.1);
}
header,
.logo {
  display: flex;
  align-items: center;
  justify-content: space-between;
}
.logo img {
  width: 48px;
  margin-right: 10px;
}
h5 {
  font-size: 16px;
  font-weight: 400;
  color: #fff;
}
header .chip {
  width: 60px;
}
h6 {
  color: #fff;
  font-size: 10px;
  font-weight: 400;
}
h5.number {
  margin-top: 4px;
  font-size: 18px;
  letter-spacing: 1px;
}
h5.name {
  margin-top: 20px;
}
.container .card-details {
  margin-top: 40px;
  display: flex;
  justify-content: space-between;
  align-items: flex-end;
}
That is all, now you’ve successfully created a Dynamic Calendar App in HTML CSS & JavaScript. If your code doesn’t work or you’ve faced any problems, please download the source code files from the given download button. It is free and a zip file will be downloaded that contains the project folder with source code files.


