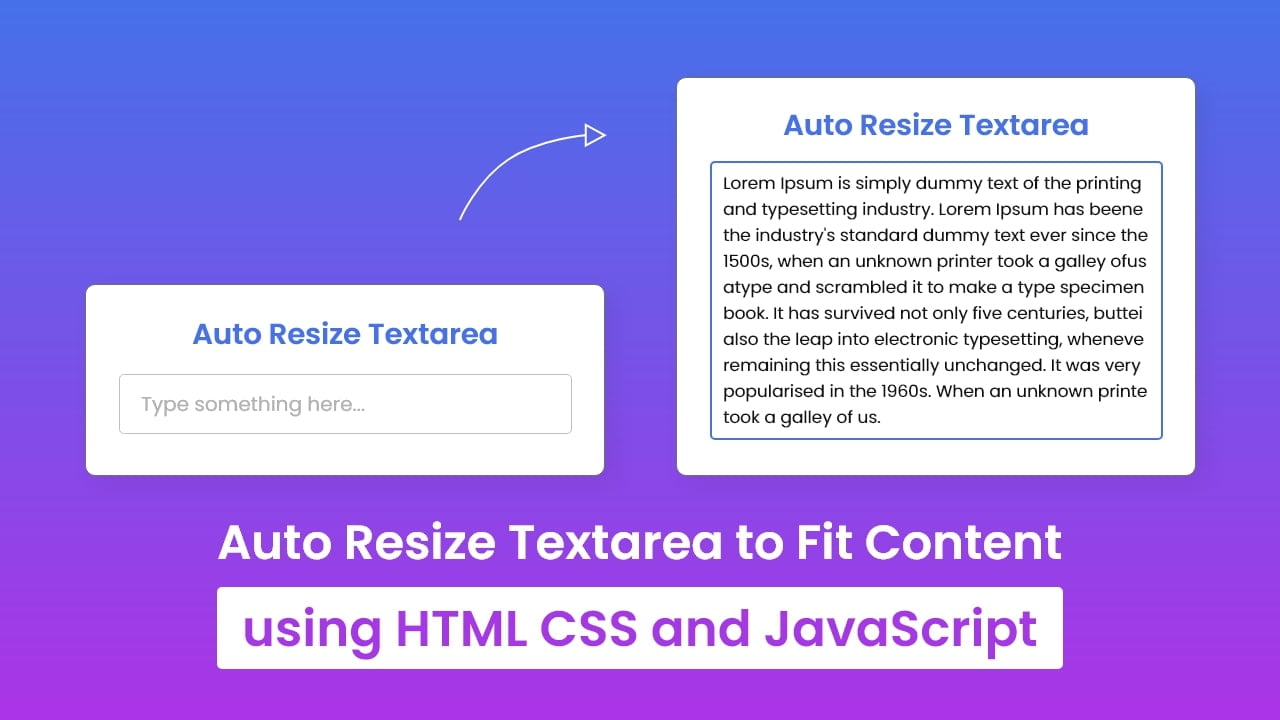
Hey friends, today in this blog you’ll learn how to Auto Resize Textarea using only HTML CSS & JavaScript. In the earlier blog, I have shared how to create Login Form Validation in HTML CSS & JavaScript, and now it’s time to create an auto resizable textarea using only a few lines of JavaScript codes.
Auto Resize Textarea means the height of the textarea automatically resizes according to its content. I have also set max-height for this Textarea, so it’ll start to scroll after the specified max-height. You may have noticed this type of auto resizable textarea in different messaging apps.
In this auto-resize textarea, as you can see in the preview image, there are shown two states of the textarea. The first one is the initial state and the second one is when you put some content in the textarea. When you start to type some characters in the textarea, it will automatically resize the height to fit its content.
Video Tutorial of Auto Resize Textarea in JavaScript
In the video, you have seen the demo of an Auto Resizable Textarea and knew how I created it using HTML CSS & few lines of JavaScript codes. I hope you’ve understood the codes and concepts behind creating this auto-resize textarea.
In the JavaScript codes, inside on keyup event, first I got the scrollHeight of the textarea. scrollHeight read-only property returns the entire height of an element in pixels. After I got the scrollHeight value, I passed this value as textarea height. So the textarea height will be the textarea scrollHeight.
I have only explained only main things on this blog but in the video, I have explained each JavaScript line with written comments. If you want to understand which line of code is doing what then please watch the above video.
You might like this:
- AdBlock Detector in JavaScript
- Contact Form using HTML & CSS
- Detect User Browser in JavaScript
- Login Form with Validation in HTML
Auto Resize Textarea in JavaScript [Source Codes]
To create Auto Resize Textarea in JavaScript. First, you need to create two Files: HTML & CSS files. After creating these files just paste the following codes into your file. You can also download the source code files of this auto resize textarea from the given download button.
First, create an HTML file with the name of index.html and paste the given codes into your HTML file. Remember, you’ve to create a file with .html extension.
<!DOCTYPE html>
<!-- Coding By CodingNepal - youtube.com/codingnepal -->
<html lang="en" dir="ltr">
  <head>
    <meta charset="utf-8">
    <title>Auto Resize Textarea in JavaScript | CodingNepal</title>
    <link rel="stylesheet" href="style.css">
    <meta name="viewport" content="width=device-width, initial-scale=1.0">
  </head>
  <body>
    <div class="wrapper">
      <h2>Auto Resize Textarea</h2>
      <textarea spellcheck="false" placeholder="Type something here..." required></textarea>
    </div>
    <script>
      const textarea = document.querySelector("textarea");
      textarea.addEventListener("keyup", e =>{
        textarea.style.height = "63px";
        let scHeight = e.target.scrollHeight;
        textarea.style.height = `${scHeight}px`;
      });
    </script>

  </body>
</html>
Second, create a CSS file with the name of style.css and paste the given codes in your CSS file. Remember, you’ve to create a file with .css extension.
/* Import Google font - Poppins */
@import url('https://fonts.googleapis.com/css2?family=Poppins:wght@400;500;600&display=swap');
*{
  margin: 0;
  padding: 0;
  box-sizing: border-box;
  font-family: "Poppins", sans-serif;
}
body{
  display: flex;
  align-items: center;
  justify-content: center;
  min-height: 100vh;
  background: linear-gradient(#4671EA, #AC34E7);
}
::selection{
  color: #fff;
  background: #4671EA;
}
.wrapper{
  width: 470px;
  background: #fff;
  border-radius: 5px;
  padding: 25px 25px 30px;
  box-shadow: 8px 8px 10px rgba(0,0,0,0.06);
}
.wrapper h2{
  color: #4671EA;
  font-size: 28px;
  text-align: center;
}
.wrapper textarea{
  width: 100%;
  resize: none;
  height: 59px;
  outline: none;
  padding: 15px;
  font-size: 16px;
  margin-top: 20px;
  border-radius: 5px;
  max-height: 330px;
  caret-color: #4671EA;
  border: 1px solid #bfbfbf;
}
textarea::placeholder{
  color: #b3b3b3;
}
textarea:is(:focus, :valid){
  padding: 14px;
  border: 2px solid #4671EA;
}
textarea::-webkit-scrollbar{
  width: 0px;
}
That’s all, now you’ve successfully created an Auto Resize Textarea using HTML CSS & JavaScript. If your code doesn’t work or you’ve faced any error/problem then please download the source code files from the given download button. It’s free and a .zip file will be downloaded then you’ve to extract it.


What if we have multiple text areas?
this code should work for all textareas in the page. If you want to have just for specific one, you have to identify them somehow.
Similarly, if we want to do it in Iframe, how can we do it?